
How to add whatsapp chat to wordpress website in 15 minutes


Try Trengo for Free

Trengo unites WhatsApp, email, web, social media, and calls in one inbox, saving your team hours of repetitive work and ensures no conversation is ever lost

In this fast-paced world, no customer wants to actively wait for a reply to the query they ask brands. Time is becoming increasingly valuable, and due to high customer service expectations, businesses fail to cater to their customers efficiently.
But not many businesses know that they can fix this with a solution as simple as embedding a WhatsApp chat button on their website.
The benefits of adding a WordPress WhatsApp button to your website
#1. Reach out to visitors after they leave your website
Adding a WordPress WhatsApp button to your website creates a direct communication channel that allows visitors to initiate a conversation with you or your team through WhatsApp, even after they've left your website.
This encourages customers to reach out, ask questions, or provide feedback, making them feel more connected and valued.
Suppose your visitors have a question about a product. Instead of using the live chat feature, they can ask question via WhatsApp and not wait for your customer rep to come online and answer. They can just leave the website, and you can answer them on WhatsApp wherever your customer support team is online.
#2. Reduce cart abandonment rate with WhatsApp retargeting
Reducing the cart abandonment rate is a crucial aspect of e-commerce success. With WhatsApp, businesses can actively engage with cart abandoners and increase conversion rates and overall sales.
You can answer any unanswered questions that made them not go through the checkout process, or give visitors discounts on their first purchase to convert them into customers.
#3. Personalised interaction
WhatsApp allows for more personalised communication compared to traditional contact forms or email. This level of personalisation can help build rapport with your audience, increasing customer satisfaction and loyalty.
Until now, when we talked about personalisation, live chat was the name of the game. But almost every business you see online nowadays uses a live chat widget, which makes it a common solution.
WhatsApp is now the next unique channel of communication to personalise communication with your customers.
Now that you know why setting up a WordPress WhatsApp chat is essential for your business, let’s show you how to do it with Trengo.
A step-by-step guide to set up a WordPress WhatsApp live chat
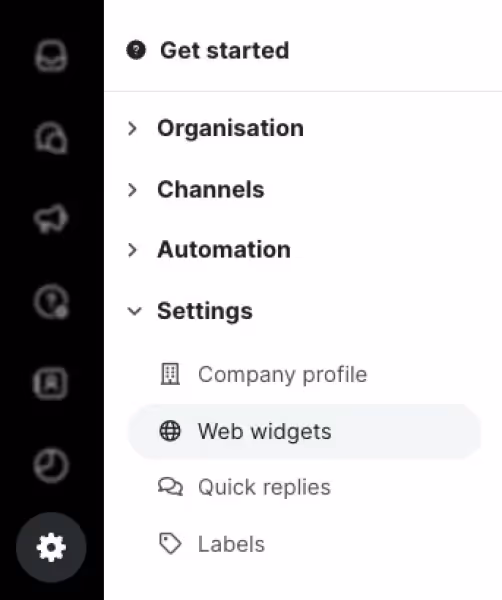
1. In your Trengo account, click on the ‘Settings’ icon in the bottom left corner, then click on the ‘Web widgets’ option.
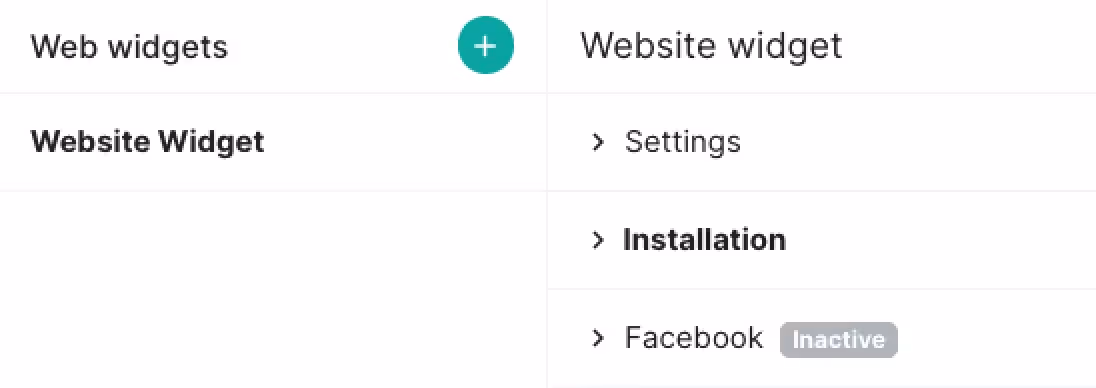
2. Click on Website widget > Installation.
In these two steps, you’ve successfully copied the WhatsApp chat installation code to your clipboard. There are two methods of embedding WhatsApp to your WordPress website:
- Use Google Tag Manager
- Use a WordPress plugin (WPCode)
Let’s first look at how to install WhatsApp to WordPress with Google Tag Manager.
Google Tag Manager installation
1. Open your Google Tag Manager account and select the website you want to install the WhatsApp website widget.

2. Click ‘New Tag.’

3. Add a name for the WhatsApp widget.
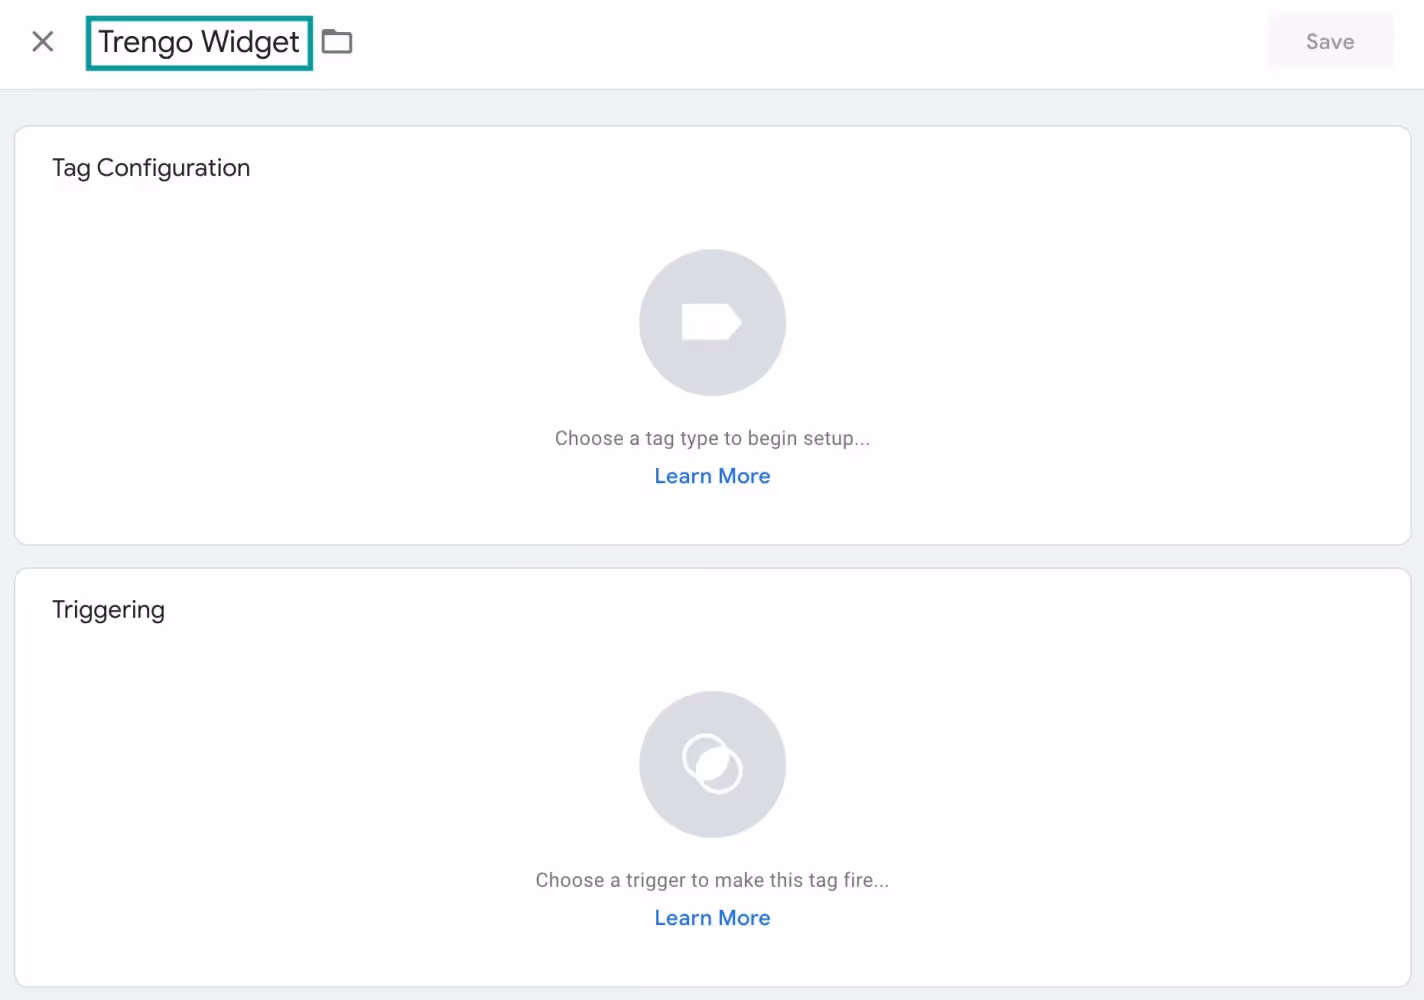
4. After naming your widget, click on ‘Tag Configuration,’ scroll down till you see an option - ‘Custom,’ and select ‘Custom HTML.’

5. Remember the installation code you copied to your clipboard earlier? Time to paste it in the custom HTML tab.
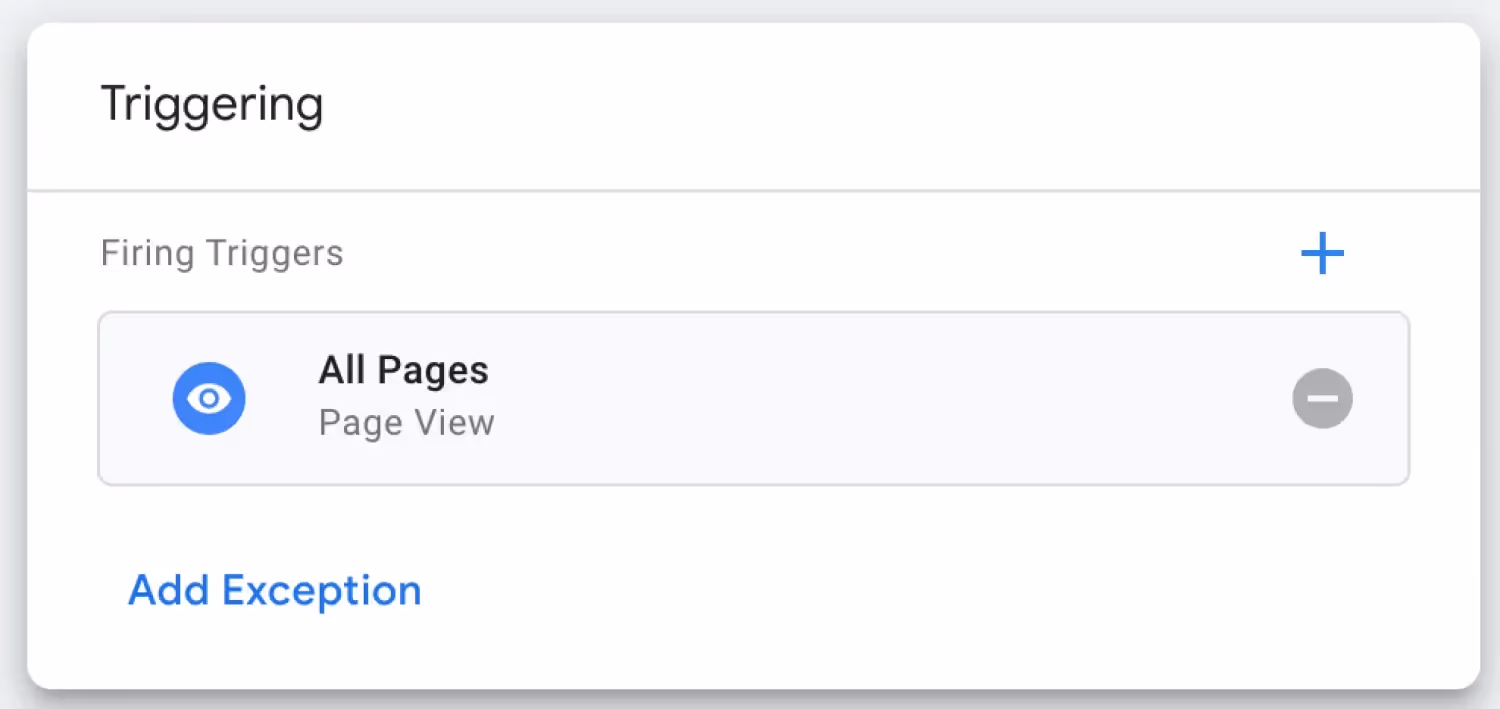
6. Now, it's time to select which pages will have this WhatsApp widget. Select ‘All pages’ if you want the WhatsApp chat to be on every page of your website.
7. Click ‘Save.’
8. Click ‘Submit’ and Voila! Your WhatsApp chat widget is live on your website.

Adding WhatsApp chat widget on WordPress website via WPCode
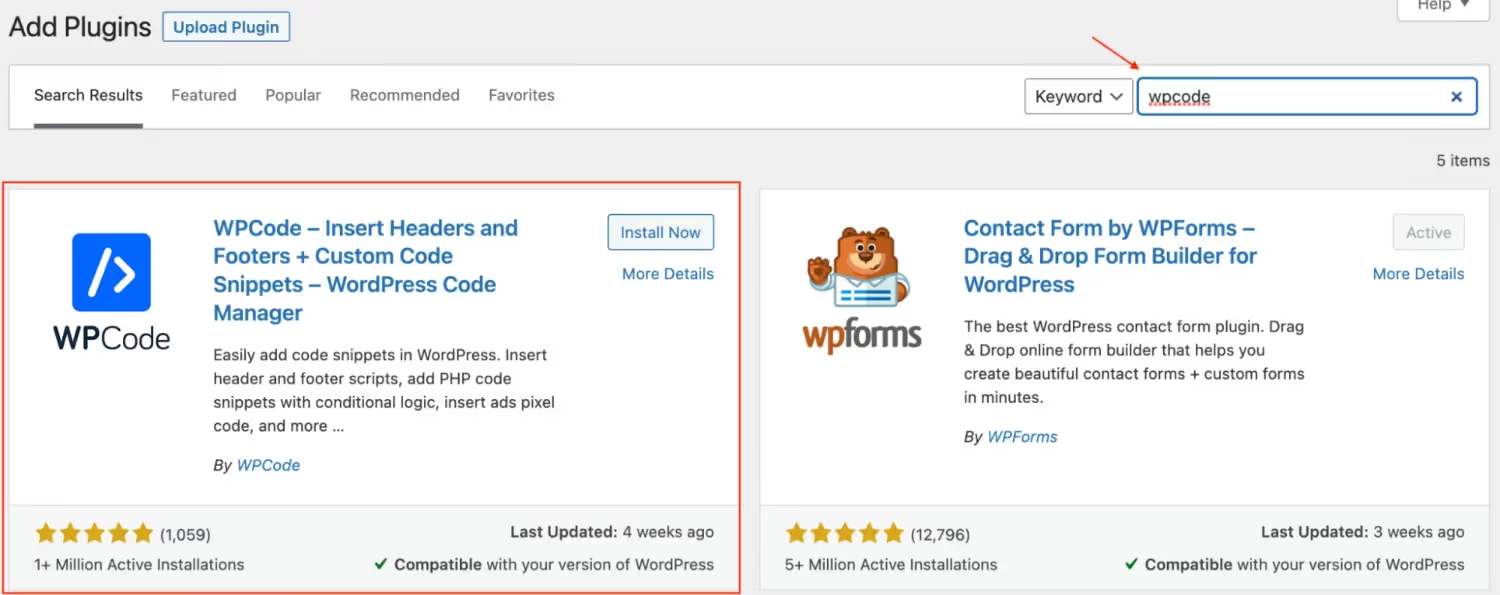
1. Go to your WordPress website’s dashboard (WP Admin), click on Plugins > Add New.

2. In the search bar, type WPCode and install the first plugin that appears on the screen.
3. Click on ‘Activate.’

4. In the left-hand side menu, you will see an option called ‘Code Snippets.’ Click on it.
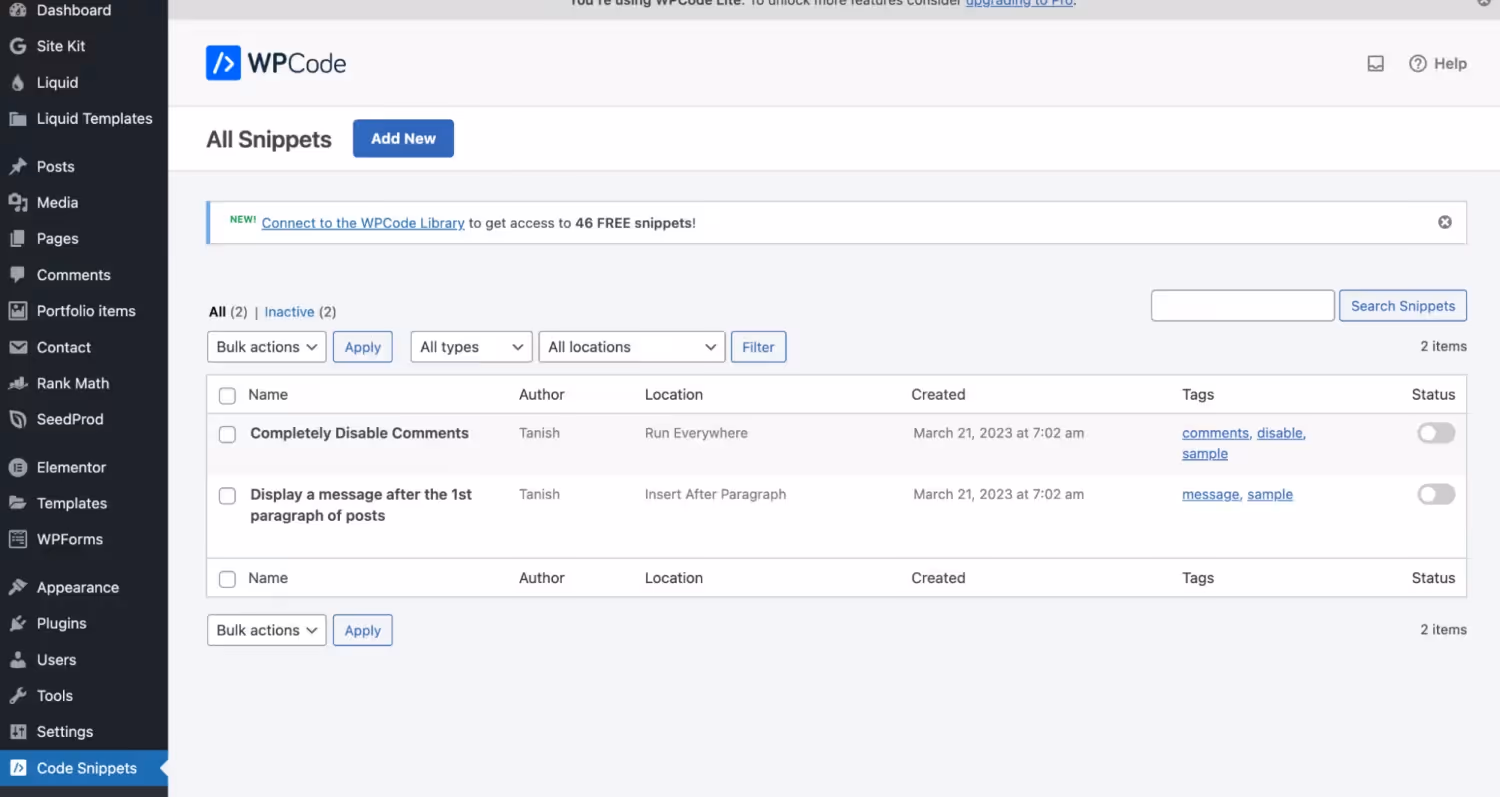
5. Click on ‘Add New.’

6. We have a custom code for installing the WhatsApp widget from earlier, so click on 'Add Your Custom Code.'

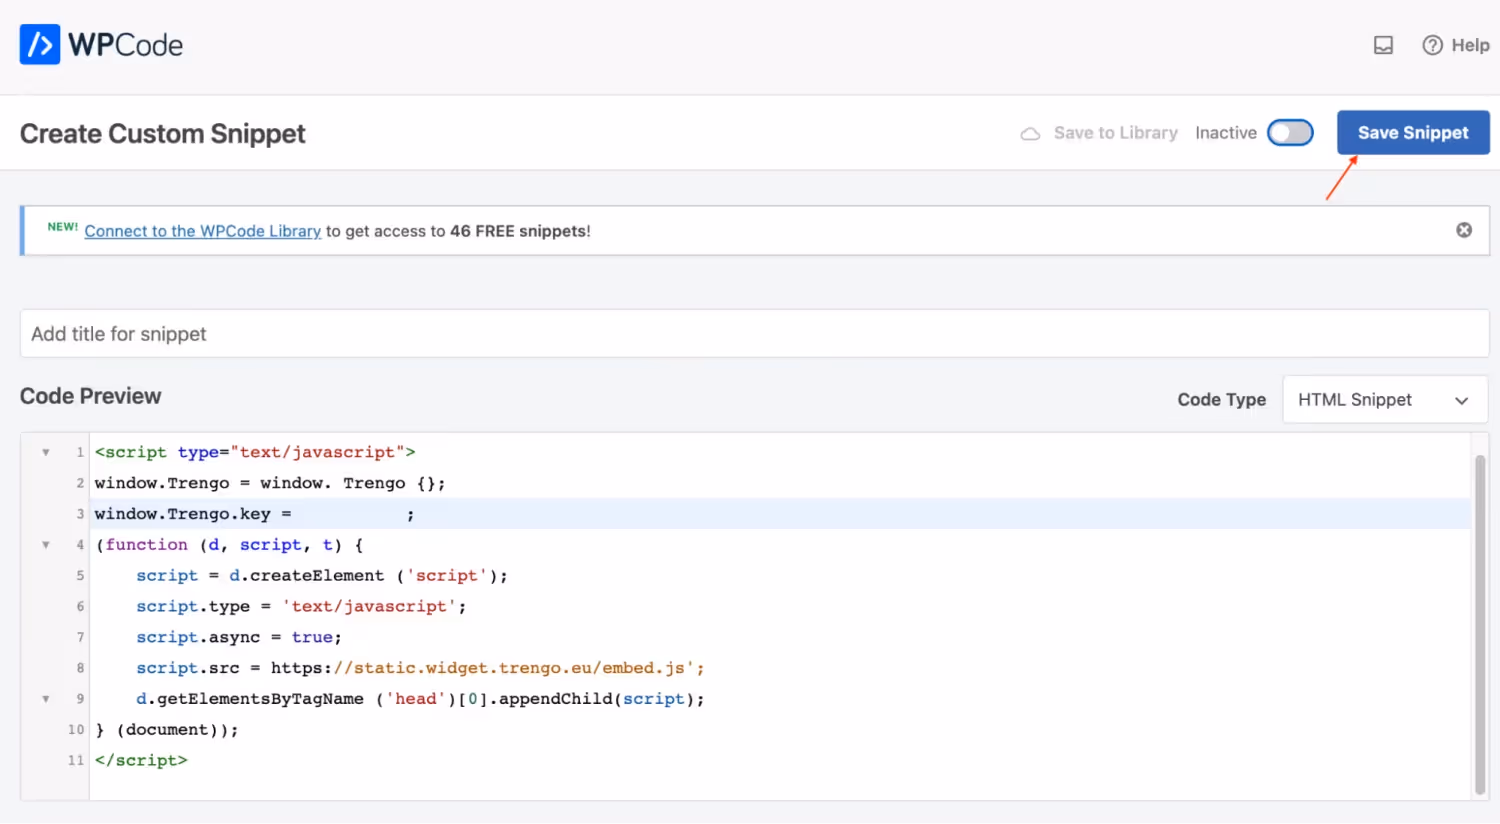
7. Paste the HTML code in the Code Preview window.

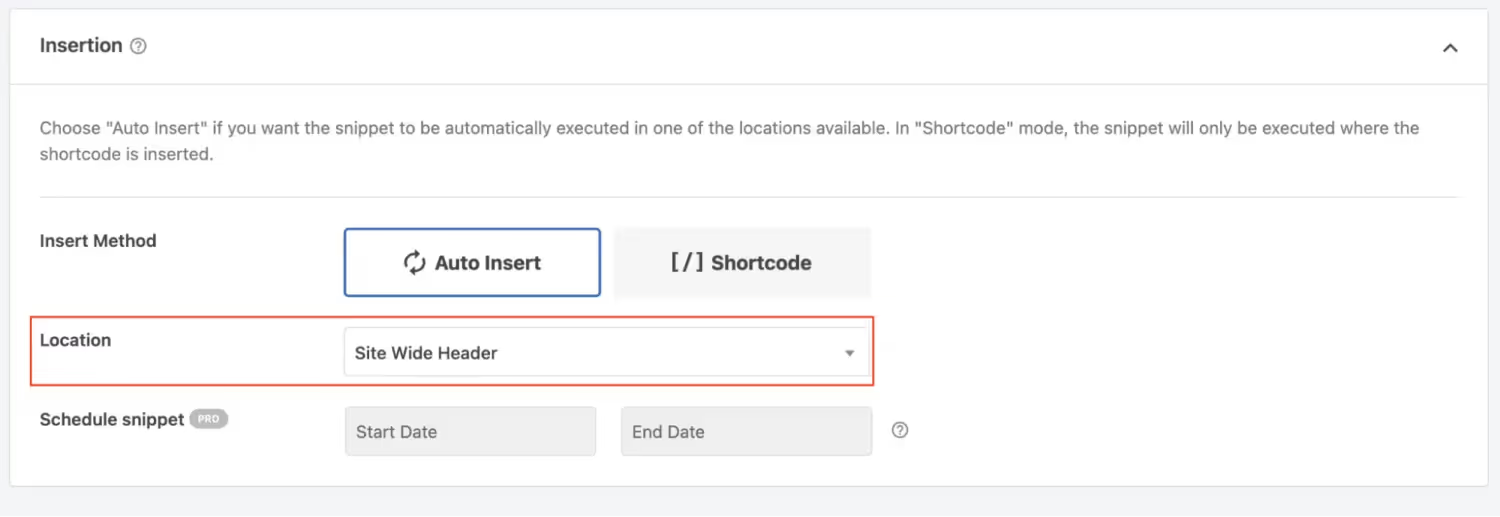
8. Scroll down and ensure the Location option is set to ‘Site Wide Header.’
9. Click on ‘Save Snippet,’ and your WhatsApp website widget is ready to go live.
With the WordPress WhatsApp integration, you can convert your cold visitors into hot leads and, ultimately, into buying customers. That's because WhatsApp lets you reach out to visitors after they've left your website, reduces cart abandonment, and personalises conversations.
An official WhatsApp Business Solution Provider like Trengo can ease things for you, and with the steps mentioned above, you can add a WhatsApp button to your website in just 15 minutes.
All you have to do is sign up for a free trial with Trengo and convert your visitors into buyers.


Let's meet
Grow your business with loyalty. Bring all of your customer contact into one, single platform to unlock delight at every step of the way.


© 2026 Trengo