For customer service and support teams, it's of great value to work efficiently. Because whenever there's a busy period and the resources are limited, time simply can't be wasted. The exact opposite of confusing conversations with colleagues about who's picking up which email. Or back and forths about who's replying to the angry customer that's been waiting too long for an answer.
At the foundation of every efficient workflow is a shared inbox. Where customer communication comes together, and where multiple users can use the same email account to handle customer communication. Because when your teams all work from the same platform, the same view even, there is a lot less space for confusion.
That's why in this blog we'll explain all you need to know about:
- The value of a team inbox
- How to sets up one email account for multiple users, using email channels
- How to automate your email workflow
How to use one email address with multiple users
Teams can use one email account with multiple users by connecting an email address to Trengo. Trengo is a smart customer engagement platform that combines all customer communication channels into one platform. And where teams can work from the same inbox.
Here, they can assign emails to specific users, collaborate on writing replies, and communicate internally (without having to CC or BCC). All while keeping their shared team inbox organized and clean. This avoids confusion between colleagues, makes it easier to reply fast, and creates amazing customer experiences.
How to set up email channels in Trengo
Once you've integrated your Gmail, Gsuite, or Outlook inbox with Trengo, or created a forwarding channel, you can set up your email channel. The channel will allow you to connect multiple users to one email address.
So how to set up a business email with multiple users? It's easy, you'll be done in 3 steps!
1. Fill out your channel name
The first step is your channel name. It won't be visible to your customers. But do pick something recognizable for your teams of course.

2. Choose the team or user
So who would you like to have access to the email channel? Your entire CS team? Or perhaps just the lead? Or even a crossfunctional team with Product Marketing, CS and Finance combined?
During the set-up of the channel, you can select either a team, multiple teams or a user.
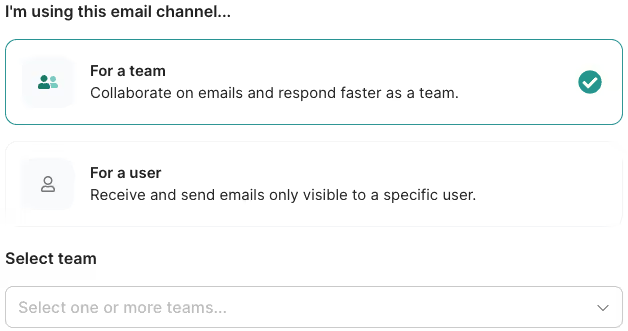
Note: When you choose to assign the inbox to a user, this email channel will be a private inbox for this user only.
3. Pick an email sender's name
This is an important step! Because the email sender name will be visible in your customer's inbox after you or your teammates have sent an email from this channel.

Tip: The company or brand name makes perfect sense of course. But for a personal touch use [agent.first_name] and/or [agent.last_name]. These customizable parts will automatically fill in the name of your team member handling the conversation.
And that's it! You've set up an email channel from where multiple team members can handle conversations. Want more info on how to optimise this email channel? Check out our Help center.
How to add users to Trengo?
During the steps described above, we mentioned adding teams. And these teams within Trengo will allow you to organize different users to work together. Like organizing one email address for multiple users.
But how do you add these teams to Trengo? Follow the steps below:
1. In Trengo, navigate to Settings > Organization > Teams;
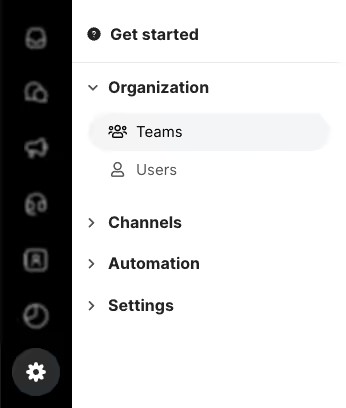
2. Click the ‘green plus’, or ‘Create a team’, and fill out the form
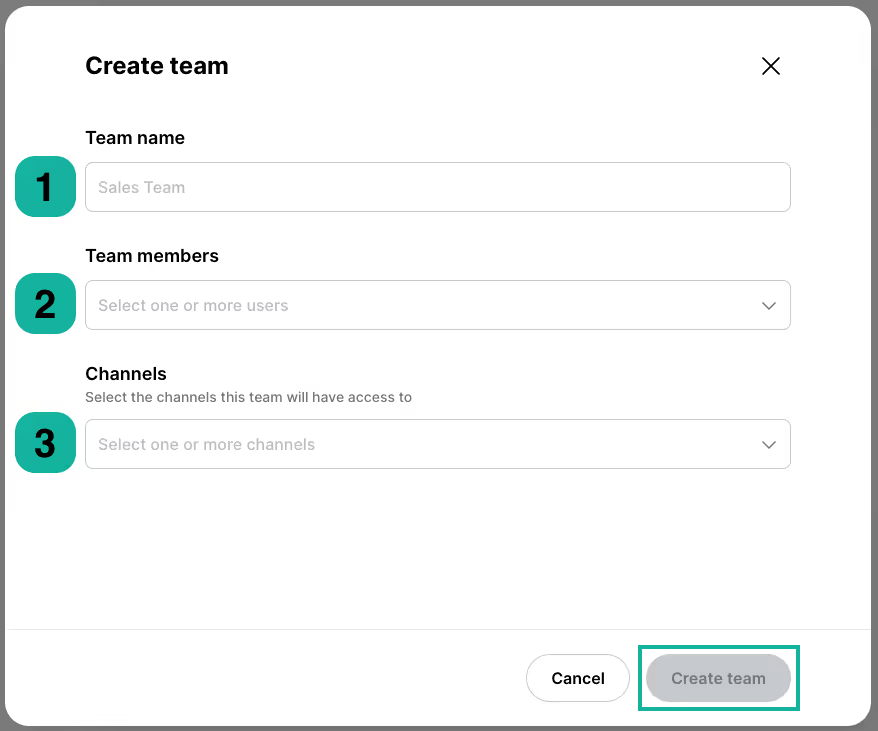
Here you can add a team name, team members and channels. The users you add here will be the ones to answer the incoming messages sent to this team. They can also start conversations, and monitor or discuss internally with other team members.
Tip: You can create teams according to the department of course. But locations (Team Utrecht) or projects (Team WhatsApp) are also possible!
Once done click ‘Create team’. And you're ready to add that team to your email channel.
Need more information on adding users to Trengo? Check out this content:
- How to add other channels to Trengo
- How to add users to your Trengo account
- How to configure user permissions
The best way for multiple users to use the same email address
Managing one email address with different people can be tricky. However, Trengo is set up to make working together for teams easier. There are various ways to automate your email workflow. Let's show you 5 tips & tricks!
How to automate workflows
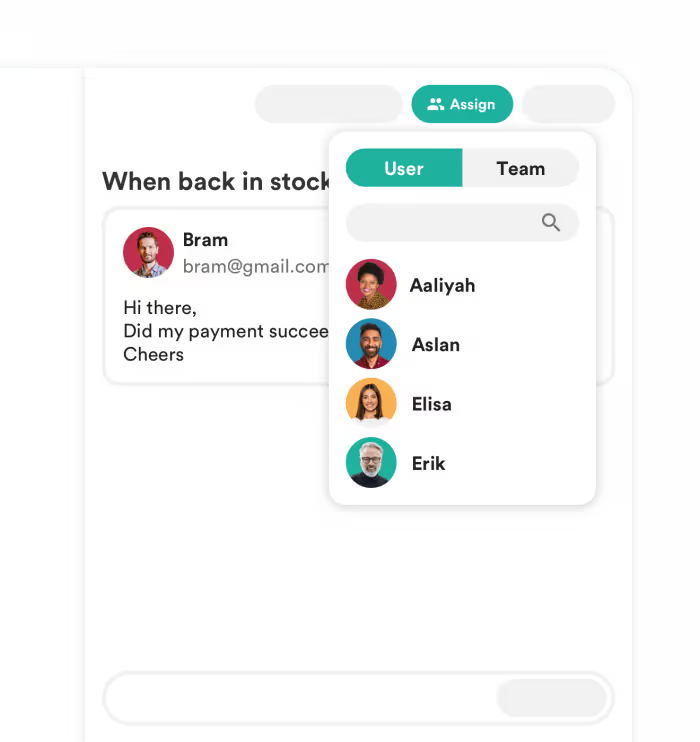
1. Assign emails
When an email comes in, you can assign it to a specific user. This way, you're sure it will be picked up. And no message gets overlooked or replied to more than once.
2. Label emails
When sharing an email account with two or more users, it's important to keep your emails organized. In Trengo, you can do this by adding labels to incoming messages.
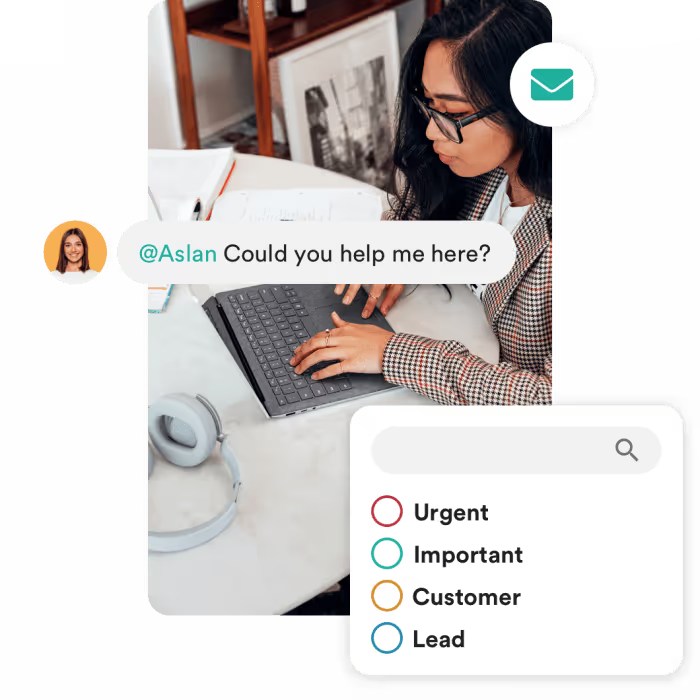
You can customize these labels to your own wishes. Examples of popular labels are:
- Urgent 🚨
- Job application 💼
- Finance 💰
Every label gets its own folder so you can quickly have a look at important emails on one specific topic.
Tip: You can create a report based on these labels, these insights are very valuable. Because when you see a lot of emails coming in about delivery you can immediately act on it. And set the automation to relieve your team. This is exactly what Parfumado did.
“Because of Trengo features such as labels, we currently have good insight into all incoming inquiries and complaints. For example, we see that 30% of the conversations are about delivery. And so we can manage this and prioritize, for example, this label and make certain improvements for the company."
Sanne de Ruiter, Customer Happiness Manager at Parfumado
Read about Parfumado's experience here.
3. Collaborate on email with multiple users
Within Trengo, users don't have to leave a conversation to communicate with their colleagues. All you have to do is @tag your colleagues and start chatting right within the email thread - without your customers noticing anything.
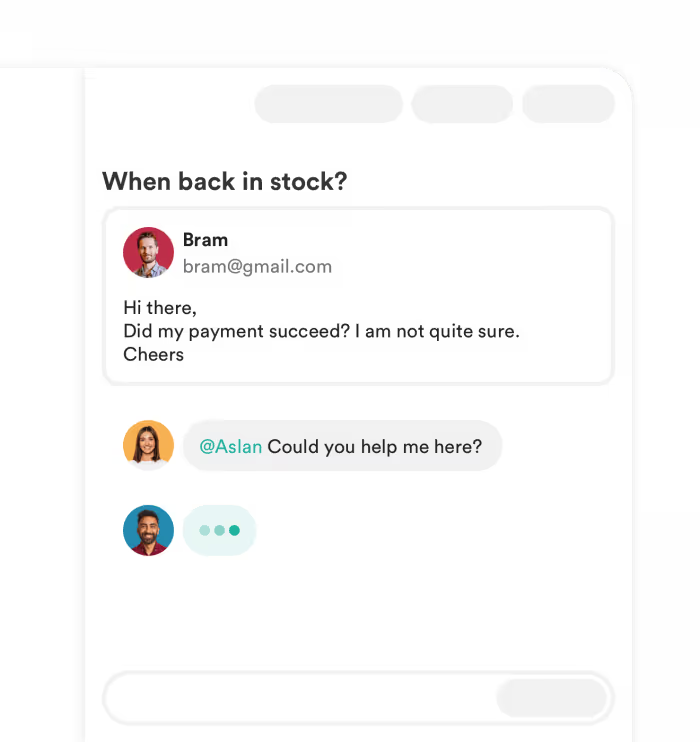
By chatting within email threads, you don't have to switch to another tool to ask questions about a customer inquiry. This enables you to work more efficiently and reply faster than before.
4. Integrate data
Whenever your team receives an email they want to create a good answer, fast. But in order to do this they need to have all customer data at hand. What are the details of the order the customer is asking about? What is the delivery status?
When you integrate Shopify, WooCommerce, Magento, Lightspeed, or more with trengo you consolidate all important data. This way you ensure your team has all the information they need to answer emails fast and correctly.
Find more information on creating a workplace that works for you here.
5. Keep a pulse on performance
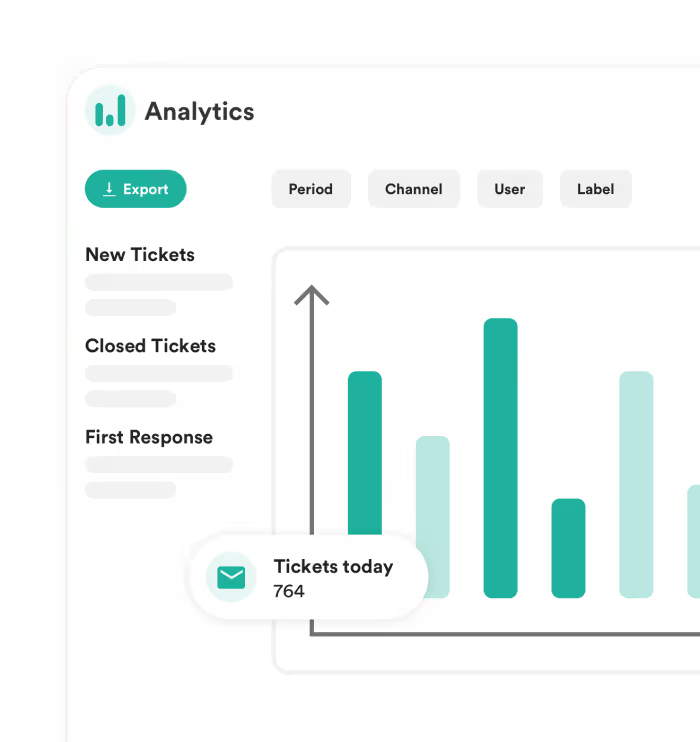
An important benefit of using a shared team inbox is the ability to monitor all the performance of your team. In one overview, you can view statistics such as how many emails are still waiting for a reply and what the average time until the first response is.
Start working together and replying faster
If you want to streamline customer engagement, customer-facing teams need to be set up for success. Workflows need to be efficient and should boost productivity. And this setup starts with Trengo.
Trengo is a smart customer engagement platform. It includes all customer communication channels and is a place where your teams can work together. Whether that's working together via one email account to improve the customer experience, or using automation to streamline communication and work efficiently. All is set up to result in a better experience for your team and customers.
Plan a demo and see how you can set up your teams for success.
Frequently Asked Questions (FAQs)
Can multiple users access the same email account at once?
Yes, multiple users can access the same email account simultaneously by using a shared inbox solution. Instead of sharing login credentials, each team member logs in with their own account and collaborates within a omnichannel inbox. Tools like Trengo are designed for this purpose, allowing teams to view, assign, and respond to emails together in real time, which increases transparency and efficiency.
How do I share one business email address with my team?
To share a business email address, set up a shared inbox using a platform like Trengo. This allows all relevant team members to access emails sent to addresses such as [email protected] from their own accounts. You can assign emails to specific users, add internal notes, and track progress, ensuring that no message is missed or answered twice.
What’s the best way to manage a shared inbox with multiple users?
The best way is to use shared inbox software that offers assignment, tagging, internal notes, and automation features. Trengo, for example, lets you assign emails, categorise them, and automate repetitive tasks, making it easier to organise workloads and prevent duplicate responses. Best practices include setting clear guidelines, using filters, delegating responsibility, and regularly reviewing inbox activity to maintain accountability and efficiency.
What tools allow multiple users to collaborate on one email address?
Leading tools for shared inbox management include Trengo, Hiver, and Front. Trengo stands out by integrating email, chat, and other channels into one platform, supporting team collaboration with features like internal notes, canned responses, and performance analytics. These tools enable seamless teamwork without the risks of shared passwords or missed messages.
How do shared inboxes improve customer support or response time?
Shared inboxes centralise all customer emails, making it easy for teams to monitor, assign, and respond quickly. This reduces the risk of missed or duplicated replies and ensures faster, more consistent communication. Features like internal notes, tagging, and canned responses help teams resolve issues collaboratively and efficiently, leading to higher customer satisfaction and improved response rates.
Can I automate responses in a shared email account?
Yes, automation is a key feature of shared inbox platforms. With Trengo, you can set up auto-responders, workflow rules, and canned replies to handle common queries or out-of-hours messages. This saves time, ensures prompt replies, and allows your team to focus on more complex issues.


.png)

